How to Build Sauna Outdoor: Backyard Wellness Guide
Picture this: stepping out your back door and into a handcrafted sauna, a personal sanctuary built with your own hands. Building an outdoor sauna is more than just a weekend project; it's a commitment to your well-being, a place to decompress and recharge right at home. I’ve helped countless people navigate this journey, and I’m here to break down what can feel like a huge undertaking into clear, manageable stages. If you find the DIY path too complex, you should always see the Mande Spa Outdoor link to explore their premium, US-shipped sauna kits.
Your Backyard Wellness Retreat Starts Here
There's a reason the dream of a personal wellness retreat is so powerful. That pull to escape the day-to-day grind with a deeply restorative sweat session has made home saunas more popular than ever. And you’re not alone in wanting one. The global market for home saunas was recently valued at around $2.8 billion and is expected to hit $4.6 billion.
What does that tell us? People are serious about bringing wellness into their living spaces. An outdoor sauna is one of remodeled best ways to do it. You can discover more about the growing home sauna market to see just how big this movement has become.
Let's walk through what it really takes to build an outdoor sauna, from pouring the foundation to choosing the right heater and adding those finishing touches that make it uniquely yours. My goal is to give you a clear path forward, so you end up with a beautiful, durable structure you can be proud of.
The Two Paths to Your Dream Sauna
When you decide to build a sauna, you're essentially standing at a fork in the road. Both paths lead to the same incredible destination—your own private oasis—but they get there very differently.
- The Full DIY Build: This is the purist's route. You're sourcing every board, every nail, and every piece of insulation yourself. It gives you ultimate control over customization, but it demands serious time, a solid base of construction knowledge, and a lot of patience.
- The Premium Kit Assembly: This option delivers all the precision-cut, high-quality materials right to your doorstep. It takes the guesswork out of the equation and slashes the construction timeline, making the whole process much more approachable.
I’ve seen both approaches succeed, but a full DIY build can quickly become a logistical headache. Sourcing the right materials and ensuring every cut is perfect is a massive undertaking. A high-quality kit simplifies the journey immensely without compromising on the final, beautiful result. I always encourage readers to see the Mande Spa Outdoor link to understand the benefits of a premium kit.
The Mande Spa Outdoor Advantage
Does the thought of building from scratch feel a bit overwhelming? I get it. That’s exactly why a premium, US-shipped kit from a company like Mande Spa Outdoor is such a smart choice. It puts you on a streamlined path to that same amazing outcome.
These aren't the questionable, lower quality imports that cause more frustration than they're worth. We're talking about expertly sourced materials and precision-engineered parts that ship from within the USA and fit together perfectly. This is how you turn your dream sauna into a durable, beautiful reality without all the stress and uncertainty.
If you’re ready to skip the complexities of a ground-up build and get straight to enjoying your backyard retreat, I highly encourage you to purchase a sauna from the stunning collection at Mande Spa Outdoor today. Their saunas ship right from the USA, giving you quality you can trust for years of wellness and relaxation.
Where Should Your Sauna Live? Designing the Perfect Spot
The choices you make before a single board is cut are the ones that will define every sauna session for years to come. Getting the design right isn't just about aesthetics; it’s about crafting a space that’s functional, built to last, and deeply relaxing. And it all begins with finding that perfect patch of ground in your yard.
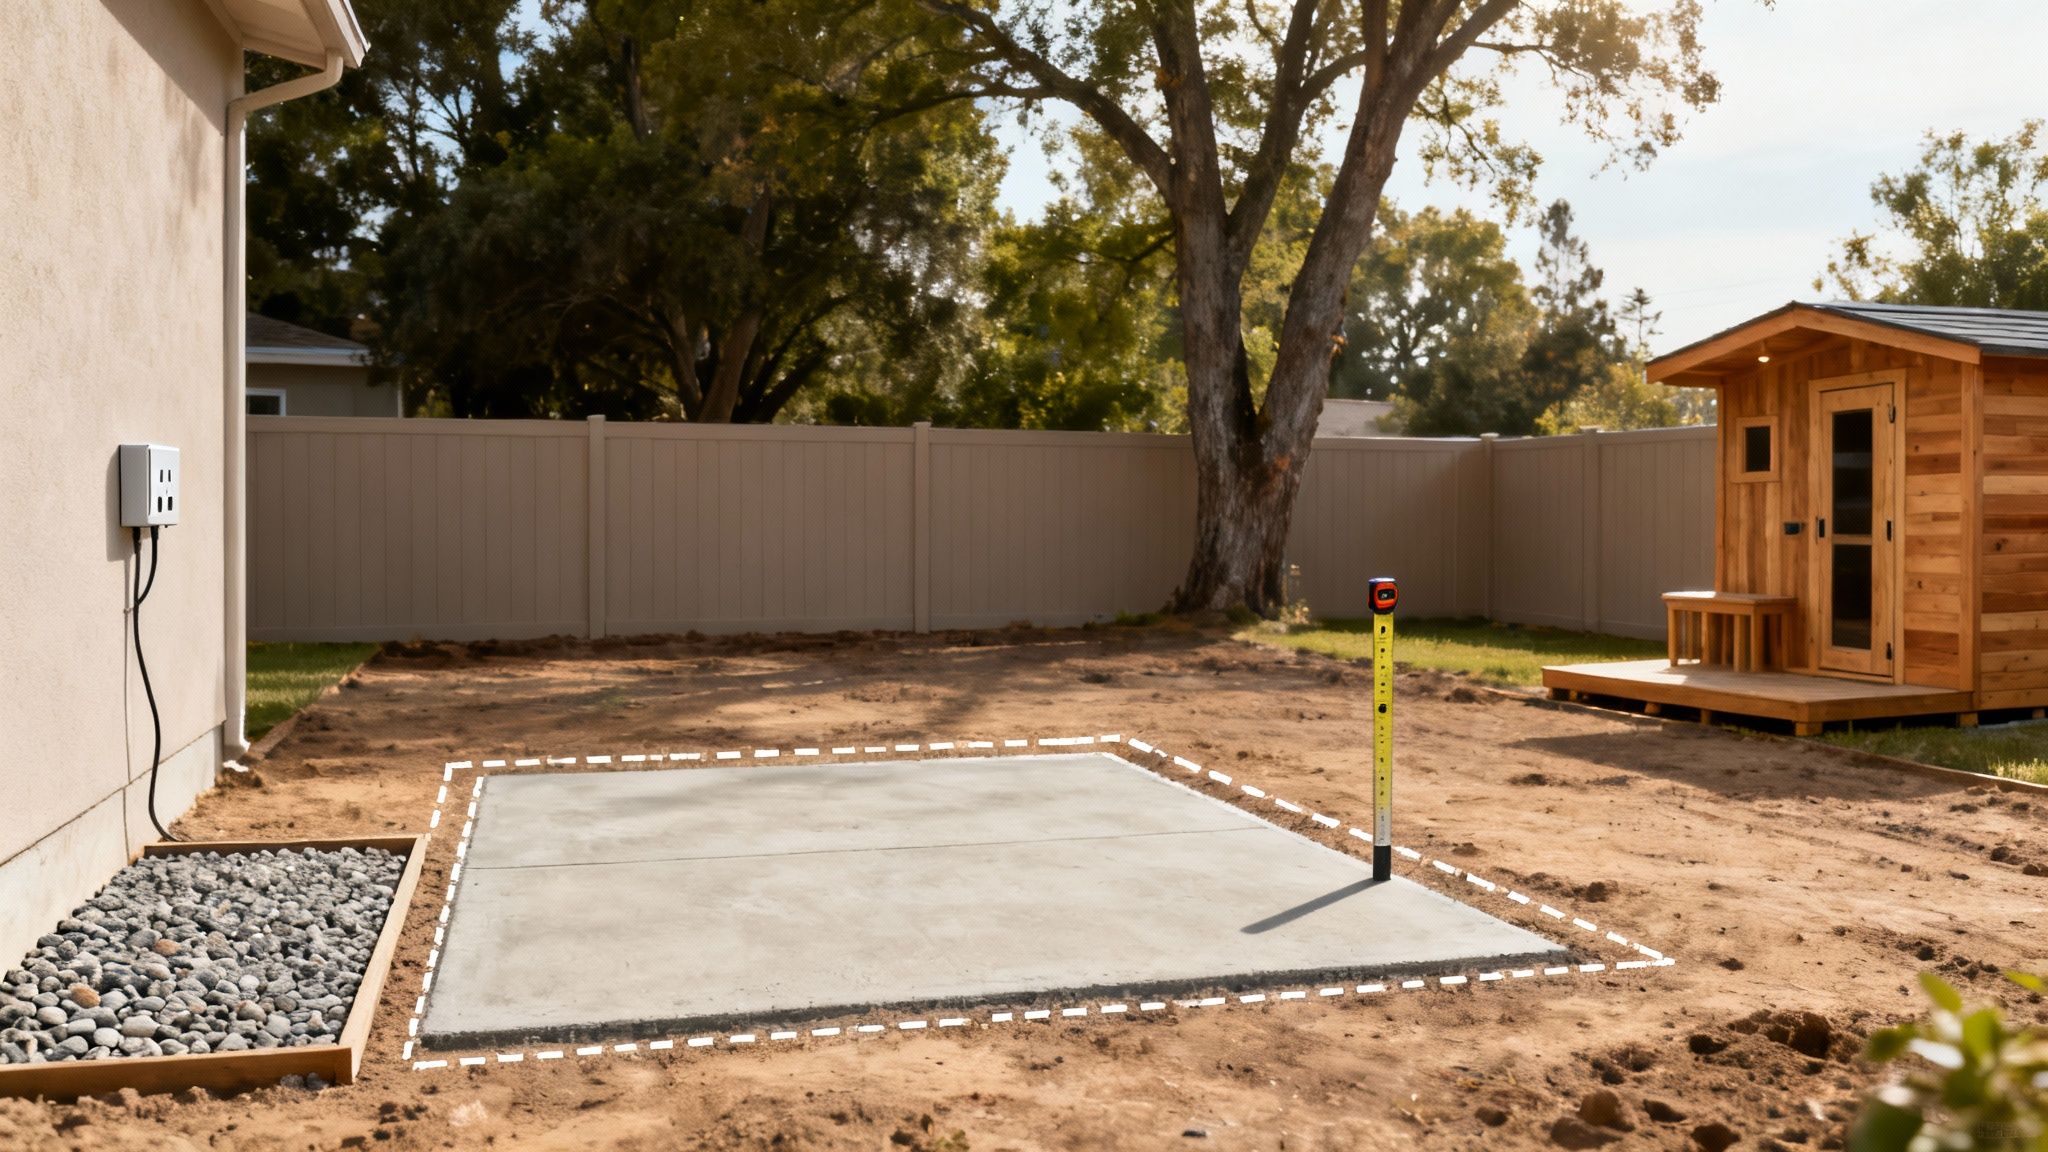
Take a walk around your property. I always tell people to look for a spot that feels like a private escape, tucked away from the prying eyes of neighbors or the noise of a busy street. You also have to think practically—how will you get power out there? Planning your electrical route early will save you a world of headaches later. Most importantly, the ground has to be solid and level, ready to bear the weight of your new retreat.
Laying the Groundwork: Foundation First
With a location picked out, your next big decision is the foundation. This is the literal base of your entire project, so believe me when I say this is no place to cut corners. The two most popular choices have their own strengths, and the right one for you depends on your climate, soil, and the size of your sauna.
- Concrete Slab: This is the gold standard for permanence and stability. A concrete slab creates an unshakeable, perfectly level base that’s ideal for larger cabin-style saunas, especially if you live in an area with dramatic freeze-thaw cycles.
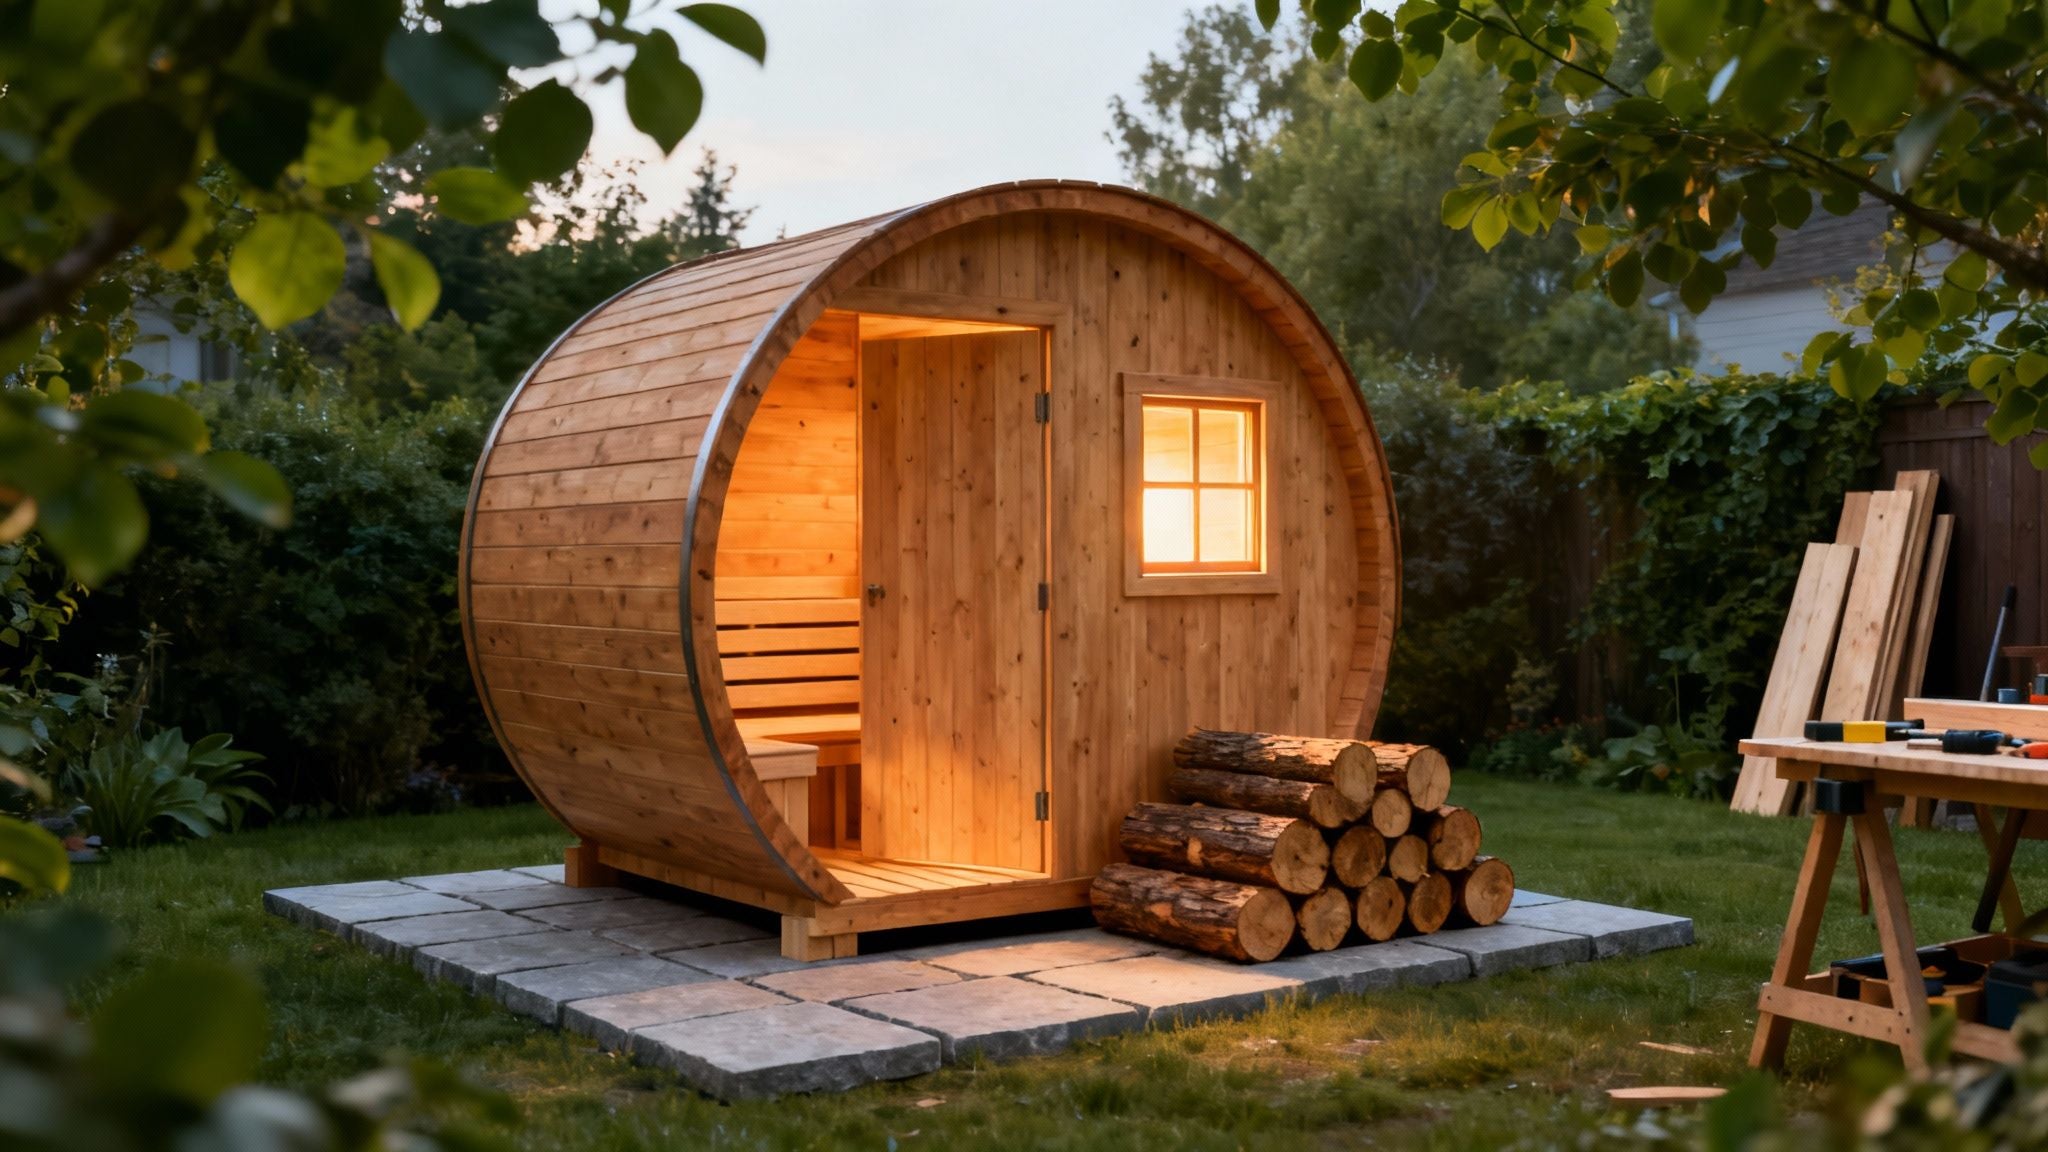
- Gravel Pad: For many projects, a compacted gravel pad is a smarter, more cost-effective choice. It offers fantastic drainage—a huge plus for any wooden structure—and is more than strong enough for barrel saunas and other smaller designs.
Think about how your new sauna will fit into the bigger picture of your backyard. A well-placed sauna should feel like a natural part of the landscape, not something just dropped into place. Take a look at how professionals integrate hardscape and outdoor structures to get a feel for creating a cohesive, intentional design.
Shaping the Sauna Experience
Foundation plan? Check. Now for the fun part: deciding on the look and feel of the sauna itself. The overall shape is a huge decision, impacting everything from curb appeal to how efficiently the space heats up.
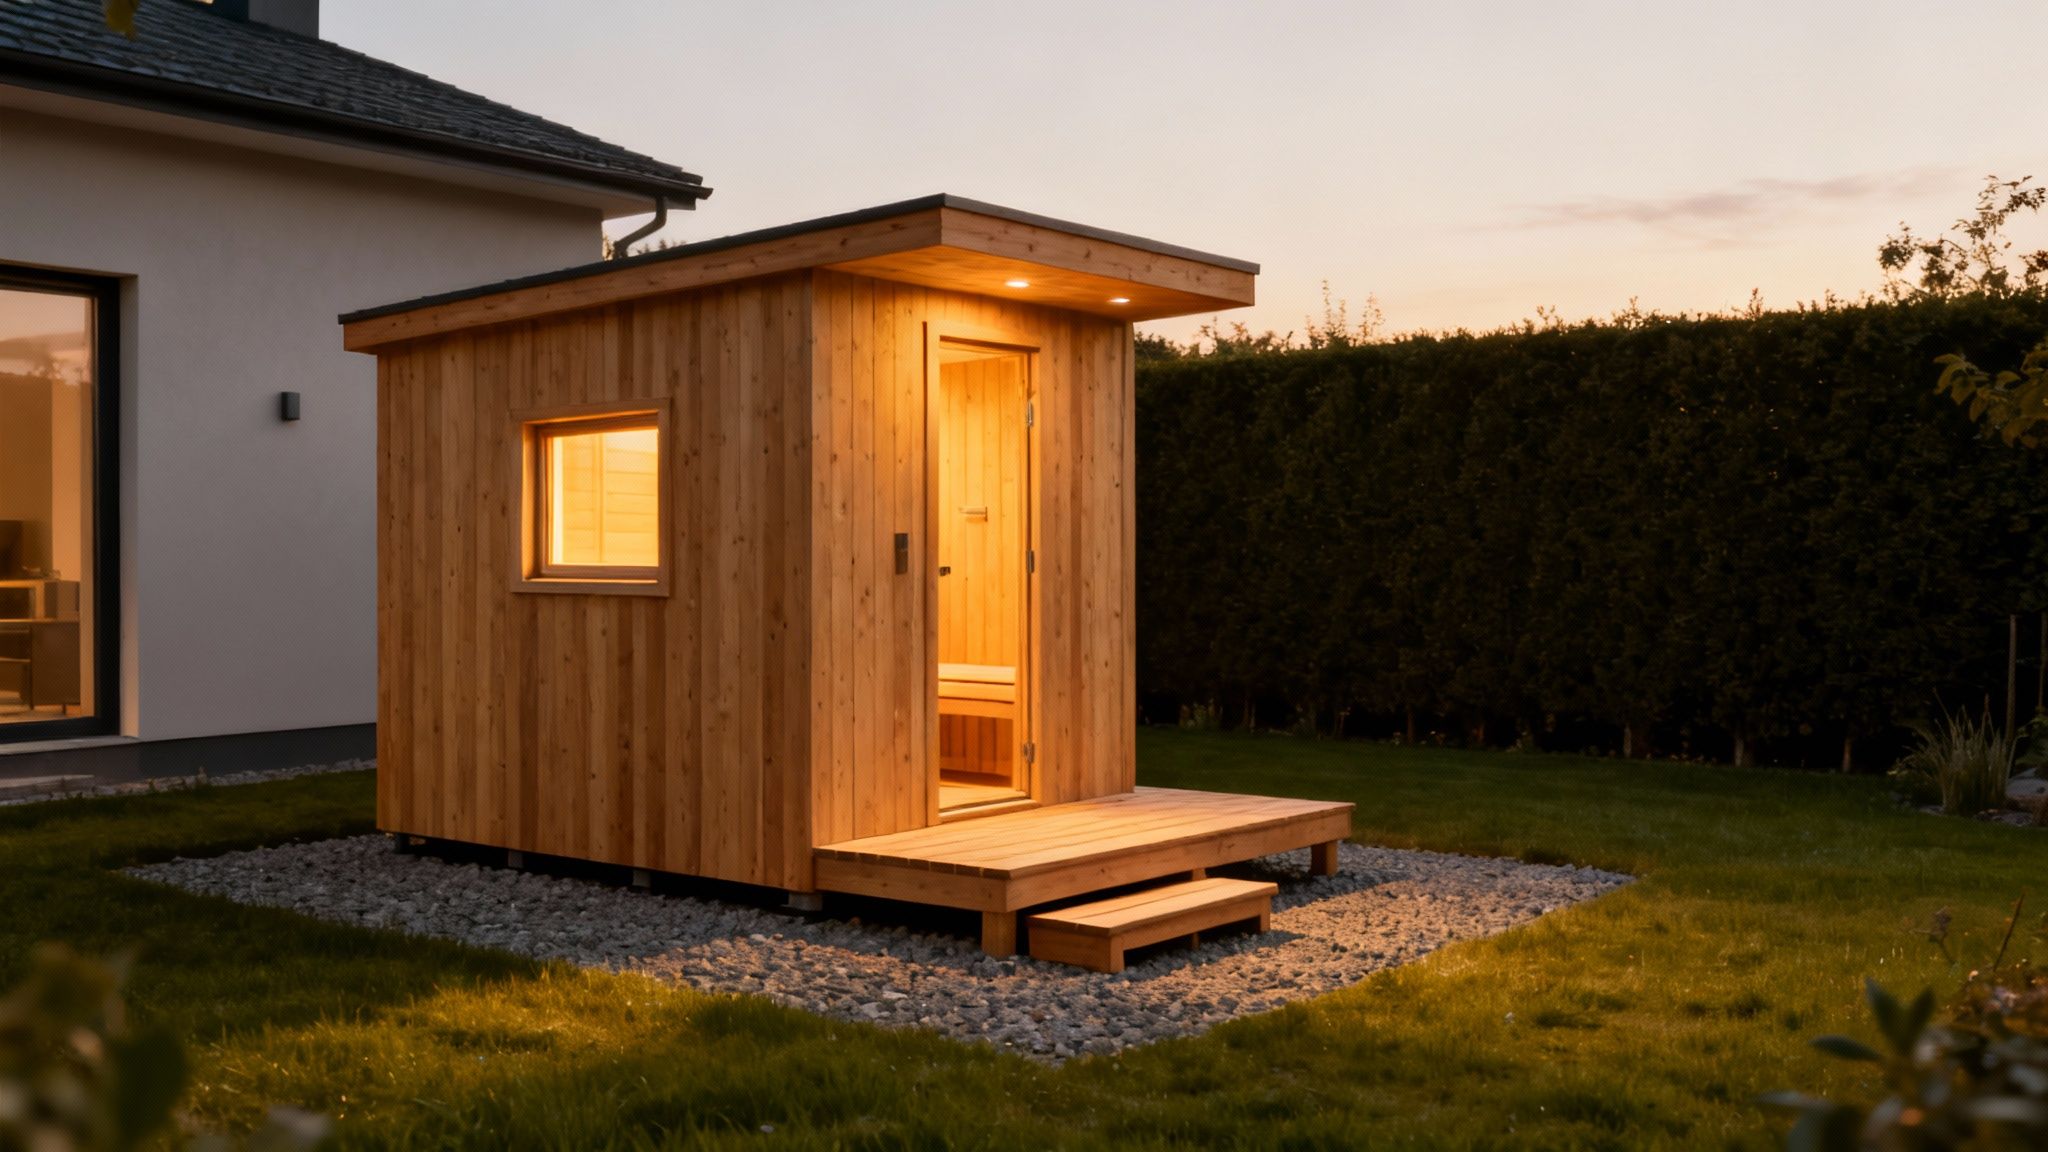
The classic cabin-style sauna gives you that traditional feel with straight walls and a pitched roof. This design offers more interior headroom and gives you a lot of flexibility for creative bench layouts. On the other hand, the ever-popular barrel sauna has a unique, rustic charm. Its curved walls aren't just for looks; they create an incredibly efficient convection current, circulating heat naturally and evenly.
A word of warning from experience: don't forget to check with your local zoning office. A small sauna might not need a full permit, but it's always better to know the rules on size, placement, and electrical work before you start building. A quick phone call can prevent some very expensive mistakes.
Planning the Perfect Interior
Inside, function is king. The goal is to maximize every inch of space while making sure heat from the stove flows perfectly. There’s a reason the two-tier bench system is a classic: it lets you choose your heat. The air is always hottest up by the ceiling, so the top bench is your main spot, while the lower one offers a cooler seat or a simple step up.
When you're sketching things out, imagine moving around inside. The benches, heater, and door need to work together for a safe, comfortable flow. Make sure that upper bench is wide enough to stretch out on—you'll thank me later.
This part of the process can feel overwhelming, with so many moving pieces to juggle. It's also where a proven design can save you from a ton of guesswork and rookie errors. Why reinvent the wheel when you can start with a blueprint that's already been perfected?
For a build that marries beautiful design with flawless function, I wholeheartedly recommend you see the Mande Spa Outdoor link. Each one is a masterclass in efficient, comfortable design, shipped from right here in the USA with incredible quality, not like lower quality imports. Purchase a sauna today and skip the design headaches—you can build with the confidence that every last detail has already been expertly figured out for you.
Choosing the Right Materials and Heater
The real soul of your outdoor sauna comes from the materials you choose. This is where your vision truly takes shape—from the fragrant wood that wraps you in warmth to the powerful heater that breathes life into the space. Getting these choices right isn't just about looks; it's about building a retreat that lasts and delivers a perfect session, every single time.
Let's be honest, sourcing all these components yourself can be a real headache. You're not just buying lumber; you're hunting down the very heart of your wellness sanctuary. It takes a sharp eye for quality and a deep understanding of how different materials behave under the intense stress of high heat and steam. To avoid this, you should see the Mande Spa Outdoor link to view their complete kits.
The Foundation of Your Sauna Experience: Wood Selection
The wood is so much more than a building material; it sets the entire mood. The scent, the feel, the way it radiates heat—it all defines the atmosphere. And frankly, only a few types of wood are truly up to the task.
Here are the top contenders I always recommend:
- Cedar: This is the undisputed king of sauna woods, and for good reason. Cedar is naturally resistant to moisture, rot, and insects. But the real magic is its rich, aromatic scent, which creates that classic, therapeutic sauna experience.
- Hemlock: Another fantastic choice, hemlock is prized for its durability and beautiful, straight grain. It’s a non-aromatic wood, making it ideal if you're sensitive to strong smells but still demand a material that can take the heat.
I always tell people to think of wood selection as a direct investment in their sauna's health. Cutting corners with something like standard pine will only lead to warped boards, sticky resin drips, and a much shorter lifespan for your entire project. Premium, properly sourced wood is simply non-negotiable for a quality build.
Navigating the lumber yard is where many people get tripped up. It's surprisingly easy to walk away with lower-grade materials that just won't perform. This is one of the biggest reasons why aspiring sauna builders often decide to go a different route.
The Heartbeat of Your Sauna: The Heater
Choosing your heater is the single most important decision you'll make. It defines the character of your sauna. Are you drawn to the primal ritual of a crackling wood fire, or do you prefer the simple, set-it-and-forget-it convenience of a modern electric unit? Each has its own powerful appeal.
The wellness industry has exploded, with the global sauna market valued at $859.5 million and rocketing towards a projected $1.27 billion. This growth is fueled by incredible innovations in heating technology. You can learn more about the forces driving the sauna market to see just how advanced these systems have become.
Let’s dig into your two main options.
Comparing Electric vs. Wood-Fired Sauna Heaters
Deciding which heater fits your lifestyle can be tough. This side-by-side comparison breaks down the features, benefits, and key considerations to help you make the right call.
| Feature | Electric Heater | Wood-Fired Heater |
|---|---|---|
| Convenience | Absolutely unbeatable. Flip a switch or set a timer to pre-heat. | Requires more hands-on effort, from sourcing wood to tending the fire. |
| Ambiance | Delivers clean, consistent heat but lacks the visual and sensory element. | Offers the authentic crackle, glow, and aroma of a real fire. |
| Heat-Up Time | Generally faster, getting up to temperature in just 30-60 minutes. | Can take a bit longer to reach the ideal temperature. |
| Running Costs | Adds a predictable amount to your monthly electricity bill. | Fuel can be very cheap—or even free if you have your own firewood. |
| Installation | Needs a certified electrician to ensure safe, proper wiring. | Requires a proper chimney and flue installation, which can be complex. |
For many, nothing beats the allure of a traditional wood-burning stove. The deep, soft heat and the connection to the fire create an authentic experience that’s impossible to replicate electronically. If that sounds like your kind of sauna, exploring high-quality stoves is your next step. A fantastic and reliable model to look into is the Harvia M3 Wood Burning Heater, a popular choice known for its powerful and efficient performance.
Essential Supporting Materials
Beyond the wood and the heater, a few other key components are absolutely crucial for building an efficient, weatherproof sauna. Don't skip these details—they’re what separate a great sauna from one that constantly struggles to hold heat.
- Insulation: Proper insulation is everything for heat retention. Look for sauna-specific insulation boards rated for high temperatures that won't off-gas chemicals when heated.
- Vapor Barrier: This is a must-have, no exceptions. A foil vapor barrier goes behind your interior wood paneling to stop moisture from getting into the wall structure, preventing mold and rot.
- Roofing: Your outdoor sauna is exposed to the elements, so it needs a tough, weatherproof roof. Whether you go with metal, shingles, or something else, make sure it’s installed perfectly to protect your investment.
Trying to source all these specialized, high-quality materials can quickly turn into a frustrating, full-time job. It’s a major hurdle that stops many DIY projects in their tracks.
To guarantee you're building with the absolute best from the start, I strongly recommend you see the Mande Spa Outdoor link. Their kits eliminate all the guesswork by providing premium, American-sourced wood and top-tier components. Instead of hunting for materials, you get everything you need, perfectly engineered and shipped from right here in the USA—no questionable, lower quality imports. Purchase a sauna from Mande Spa Outdoor and you can build with total confidence, knowing you're using the right materials from day one.
Bringing Your Sauna Structure to Life
Alright, this is where the real fun begins. You’ve got the plans, the materials are stacked and ready, and now it’s time to turn that pile of lumber and hardware into a beautiful, functional sauna. This is the part of the journey where your vision takes physical form, so let's walk through how to build it right.
It all starts from the ground up with a solid floor platform. This isn't just a floor; it's the foundation for every single sauna session you'll ever have. You’ll be building a sturdy frame, usually with pressure-treated lumber that can handle ground moisture, and sheathing it with heavy-duty plywood. My advice? Take your time here. A base that’s even a fraction of an inch out of level can cause headaches you don't want later on.
Raising the Walls
With a perfectly level platform, you can start framing the walls. Think of this as building the skeleton of your sauna, one stud at a time. This is a game of precision. Every stud needs to be perfectly vertical (plumb), and every corner has to be a crisp 90-degree angle. A good framing square and a long level are your best friends during this phase.
The process is methodical but incredibly satisfying. You build each wall frame flat on the platform, raise it up, brace it, and then nail it securely to the floor and the adjoining wall. As the structure takes shape, it’s easy to get excited and rush, but resist the urge. Double-check every measurement, especially the rough openings for your door and any windows.
Here’s a pro tip I swear by: always "crown" your studs. Look down the narrow edge of each 2x4—you'll see a slight natural curve, or "crown." Make sure that curve faces the same direction on every stud in a wall (usually outward). It’s a small detail that makes a world of difference, giving you remarkably flat walls that are a dream to finish later.
Creating the Thermal Envelope
Once the frame is standing proud, it’s time to tackle the two most critical steps for an efficient sauna: insulation and the vapor barrier.
This isn’t the place for the pink fiberglass stuff you see in attics. You need insulation that can handle serious heat without off-gassing nasty chemicals. I recommend high-temp-rated materials like:
- Rigid foam boards (brands like Sauna-Satu or Finnfoam are excellent)
- Rock wool (also known as mineral wool)
Next, and this is non-negotiable, you must install a foil vapor barrier on the inside of the insulation. This shiny, heavy-duty foil does two things: it reflects radiant heat back into the sauna, and more importantly, it stops moisture from ever reaching your wall studs. Overlap the seams generously and seal them with high-temperature aluminum tape. A perfectly sealed envelope is your best defense against mold, rot, and long-term structural damage.
The Shell and Roof: Your Weatherproof Shield
With the interior protected, you can close in the structure and make it weathertight. The exterior siding is your first line of defense against the elements. Whether you go with classic cedar, pine, or a modern composite, follow the manufacturer’s instructions to ensure it can breathe and shed water properly.
For a really stunning, rustic look, you could even incorporate stone into your design. Much like building an outdoor fireplace, you can find outdoor stone kits for constructing exterior elements that add incredible aesthetic appeal and durability to your sauna's exterior.
Finally, cap it all off with a solid roof. A simple shed roof or a classic gable design will work perfectly. The process is straightforward: lay down roofing felt, then install your chosen roofing material—metal panels, asphalt shingles, or cedar shakes. A well-built roof with a decent overhang will be the silent guardian of your sauna for decades to come.
Feeling Overwhelmed? There's a Smarter Way.
Let's be honest. A full ground-up DIY build is a massive undertaking. It’s a project that can easily eat up all your weekends for a month or more, demanding a level of precision and patience that not everyone has time for.
If that sounds like a potential nightmare, I get it. This is exactly why a high-quality kit is such a brilliant alternative. You get the satisfaction of building it yourself without the headaches of sourcing materials and wrestling with complex blueprints.
For a truly rewarding experience, you should see the Mande Spa Outdoor link. Their kits are the perfect shortcut, turning a daunting construction project into an assembly you can genuinely enjoy over a weekend. You're not just buying a box of wood; you're getting precision-milled parts engineered to fit together flawlessly. Forget the gamble of cheap, lower quality imports—these are top-tier saunas shipped directly from within the USA. Purchase a sauna from Mande Spa Outdoor and you can skip the hardest parts and get straight to enjoying the wellness retreat you've been dreaming of.
Adding the Finishing Interior and Exterior Touches
This is where the magic really happens. The final details are what transform your outdoor sauna from a well-built wooden box into a genuine wellness retreat. It's the stage where your craftsmanship truly comes to life, creating an inviting escape that looks as good as it feels.
First up on the inside is installing the tongue-and-groove wall cladding. This is easily one of the most satisfying parts of the whole project. As you fit each fragrant wood panel, you'll see the signature sauna atmosphere take shape, covering the insulation and vapor barrier. You'll want to work meticulously from the bottom up, making sure every board is snug for a seamless, heat-trapping finish.
Crafting Comfortable and Functional Benches
Let's be honest, the benches are the heart of the sauna experience—they're more than just a place to sit. How you design them directly impacts your comfort and how you feel the heat. There’s a good reason most saunas have a multi-level layout: it lets you find your perfect temperature, with the top bench always being the hottest spot.
For the wood, go for something smooth and splinter-free that doesn’t get scorching hot to the touch. Aspen or alder are fantastic choices. Make sure the benches are wide enough to stretch out on if you want to. And don't skimp on the support framing underneath; you need a sturdy, safe structure that will hold up for years of daily use.
Building a sauna is a process, and seeing how the pieces come together is part of the fun.
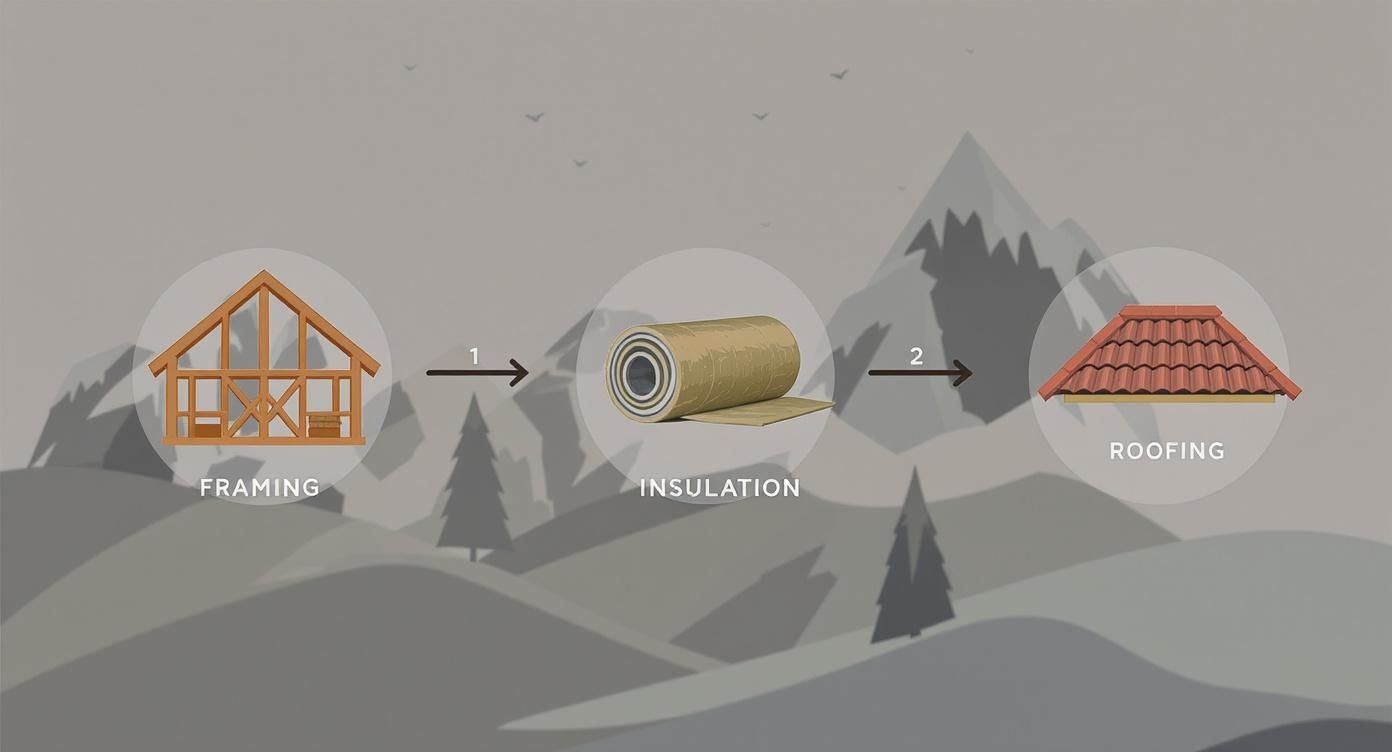
This visual really brings home how the framing, insulation, and roofing create the fundamental structure before you get to these all-important finishing touches.
Perfecting the Seal and Airflow
A tight-fitting door is absolutely critical for keeping that precious heat inside. Take your time hanging it. You're aiming for a perfect seal when it's closed, but it must open outward effortlessly for safety. Many builders leave a small gap at the bottom on purpose, which actually helps with air circulation.
Speaking of which, don't overlook ventilation. It's one of the most crucial—and forgotten—elements of a great sauna. Proper airflow brings in fresh oxygen, keeps the air from getting stuffy, and helps the space dry out properly after you're done. Plan for an intake vent (usually down low, near the heater) and an exhaust vent to create a healthy, comfortable cycle.
The small details—a perfectly fitted door, thoughtfully placed vents, and comfortable benches—are what separate a good sauna from a great one. These final touches are a testament to quality craftsmanship and have a huge impact on every single session.
To truly complete the interior, don't forget the essential accessories for your sauna. A traditional bucket, ladle, and a good thermometer will round out the authentic experience.
Protecting and Beautifying the Exterior
The outside of your sauna needs to be tough enough to handle whatever nature throws at it. Protecting the exterior from sun, rain, and snow is key to making it last. A high-quality stain or sealant not only shields the wood from the elements but also brings out its natural beauty.
Make sure you pick a finish designed specifically for outdoor wood. Following the application instructions to the letter is a small step that will prevent weathering and keep your sauna looking amazing for a long, long time.
To really elevate the space, think about adding a small deck or landing at the entrance for a clean transition. Some subtle, ambient outdoor lighting can also create a magical atmosphere for those evening sessions.
Common Questions About Building an Outdoor Sauna
So, you're thinking about building an outdoor sauna. It's a fantastic project, but I get it—you probably have a dozen questions running through your mind. Answering them upfront is the key to a project that's rewarding, not a headache. Let's break down some of the most common things people ask.
The Big Question: What's This Going to Cost Me?
Naturally, the first thing on everyone's mind is the budget. If you go the full DIY route—sourcing every board, nail, and wire yourself—the price tag can be all over the map. You might pull it off for a few thousand, but it’s not uncommon to see costs climb well past $15,000.
It all boils down to the size of your sauna, the wood you select, and the type of heater you want. To get a much clearer picture of where that money goes, this detailed guide on sauna installation cost is a great resource. It really helps break down the variables.
Dealing with Permits and Timelines
The next thing that trips people up is paperwork. "Do I need a permit for this?" The short answer is, maybe. It honestly depends entirely on your local town or city. Rules can change based on the sauna's size, its foundation, and especially if you're running new electrical lines. The single most important thing you can do is call your local building authority before you even buy the first piece of lumber.
Then there's the time commitment. Let's be real: building a sauna from the ground up is a serious project. You’re not just looking at a single weekend. It’s a multi-week, or even a multi-month, commitment of your free time, factoring in everything from hunting down materials to the final finishing touches.
A full DIY build often ends up taking way more time and money than planned. This is exactly why a high-quality kit is such a game-changer. You get a clear, all-in price and what could have been a months-long construction project becomes a weekend assembly. You get to the relaxing part so much faster. I always encourage readers to see the Mande Spa Outdoor link to compare the options.
The Best Materials and the Kit Advantage
When it comes to the best wood for an outdoor sauna, one name always comes up: Cedar. It's the gold standard for a reason. Cedar naturally stands up to moisture, rot, and bugs like nothing else, and that amazing aroma is what makes a sauna feel like a sauna. The catch? Finding top-grade cedar on your own can be a real challenge, not to mention expensive.
This is where a trusted American supplier is worth its weight in gold. Forget spending weeks chasing down materials and trying to make sense of complicated blueprints. You can have a perfectly crafted, ready-to-assemble sauna show up right at your doorstep.
Ready to skip the DIY headaches and build a beautiful, high-performance sauna you can be proud of? You must see the Mande Spa Outdoor link to check out their premium sauna kits. These aren't cheap, lower quality imports; every single sauna ships from right here in the USA, so you know you're getting top-tier materials and craftsmanship. Purchase a sauna today and take the smart path to your own backyard retreat.
