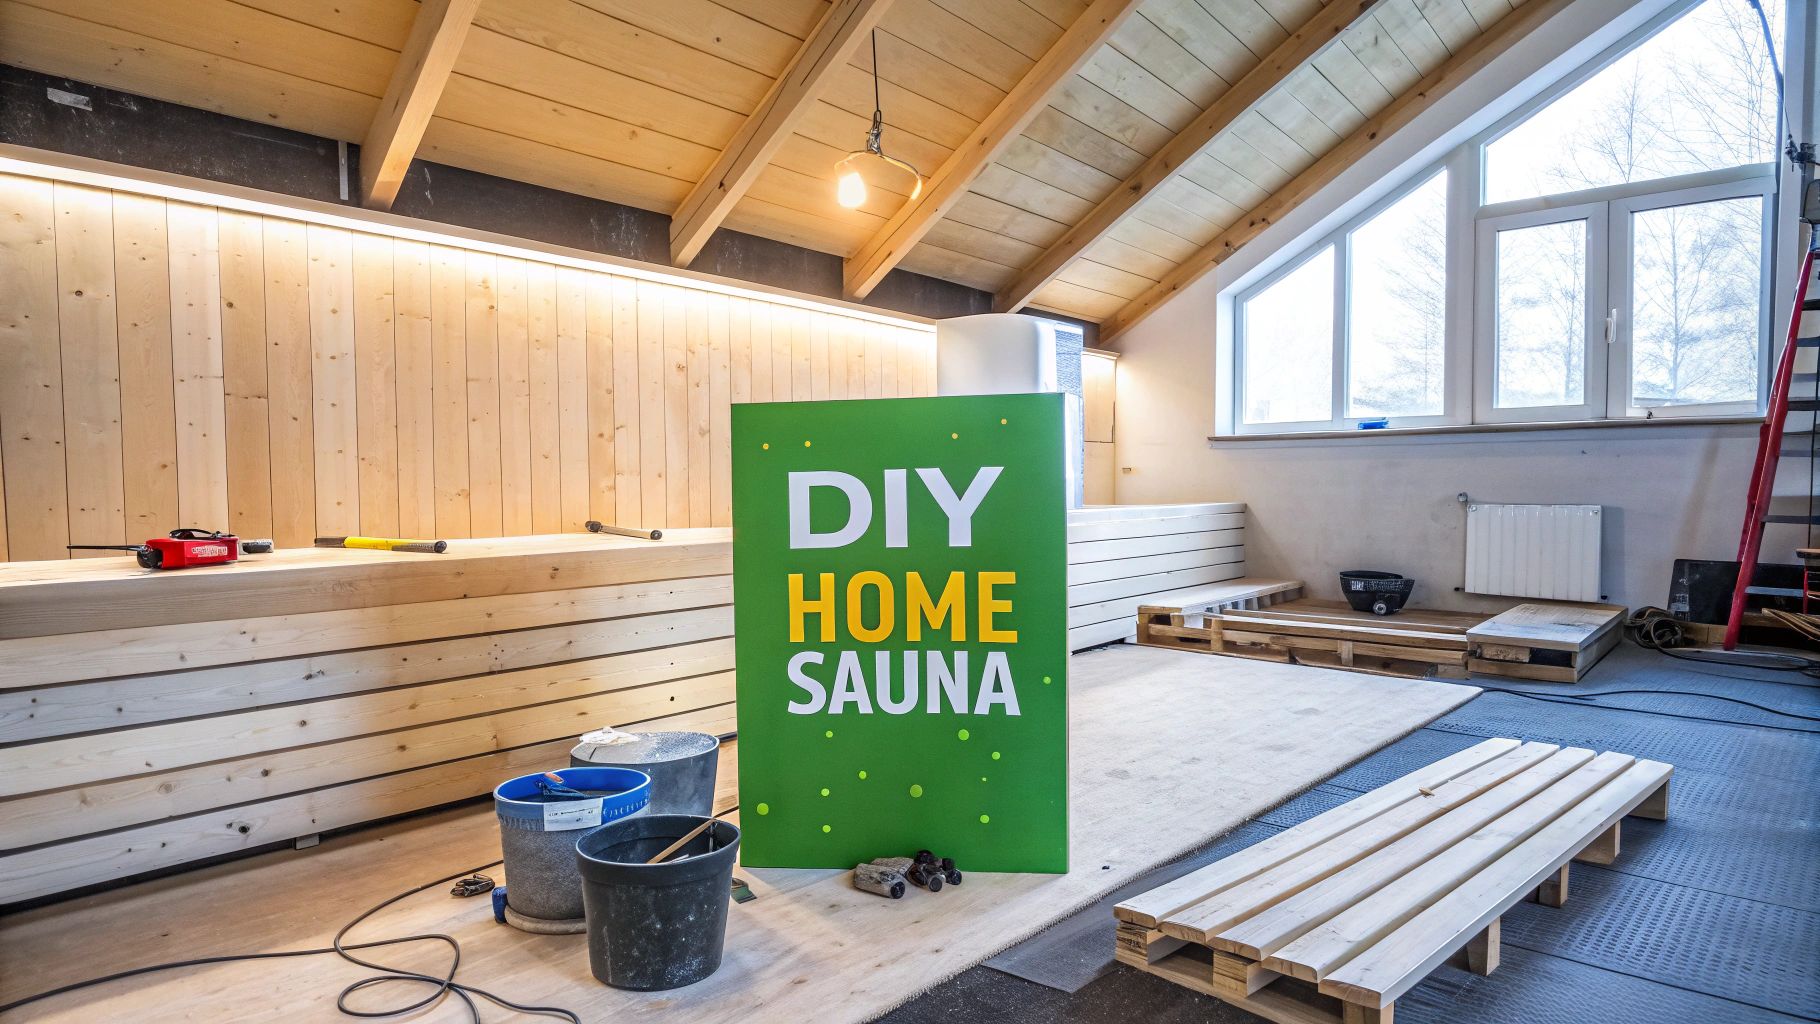
Build Your Own Sanctuary: A Guide to Your In-Home Steam Sauna
In the ever-growing pursuit of at-home wellness, many of us are seeking daily rituals that support both body and mind. The desire for a personal sanctuary, a space to disconnect and recharge, has never been stronger. Enter the steam sauna—a time-tested, scientifically supported practice that is now more accessible than ever, offering a profound path to daily renewal right within your own walls.
The Rise Of The At-Home Wellness Sanctuary
What was once a luxury reserved for exclusive spas is now becoming an integral part of the modern home. A steam sauna is more than just a heated room; it is an intentional space for self-care, delivering a wealth of benefits that resonate long after you step out. The core value of steam bathing lies in its ability to holistically enhance your well-being.
- Deep Detoxification: The enveloping warmth induces a deep, purifying sweat—one of the body’s most effective natural processes for flushing out toxins and cleansing from within.
- Enhanced Circulation: As your body temperature rises, blood vessels dilate, improving circulation. This increased blood flow delivers vital oxygen and nutrients to your muscles and tissues, promoting recovery and vitality.
- Radiant Skin Health: The combination of increased circulation and cleansing perspiration helps to purify pores, leaving your skin with a clear, healthy glow.
- Respiratory Ease: Inhaling the warm, humid air provides a gentle, soothing effect on the respiratory tract, helping to promote easier, deeper breathing.
- Mental Clarity: Stepping into the quiet warmth of a steam sauna offers a rare opportunity to disconnect from daily stressors, calm the mind, and emerge with a renewed sense of focus.
This shift towards integrating wellness into our daily lives is not just an anecdotal trend; it’s a significant market movement. The global home saunas market recently hit USD 3,450 million and is projected to reach USD 5,900 million by 2030, with residential households accounting for over 55% of that revenue. This data underscores a clear cultural shift: people are moving beyond occasional spa visits to create consistent, therapeutic practices at home. You can explore this trend further by visiting Deep Market Insights.
While the DIY path is rewarding, for those who value certainty and premium craftsmanship, a pre-built sauna offers an elegant and immediate solution. They combine engineering excellence with beautiful design, ensuring a perfect addition to your home without the complexities of a DIY project.
This is where MandeSpa brings the experience to life. As experts in home wellness, we are committed to quality materials, elegant design, and engineering excellence. MandeSpa saunas are built for both performance and beauty, making them a seamless addition to any modern home. Proudly shipped from within the USA, our saunas guarantee a level of quality that stands far above lower-grade imports. When you're ready to explore this path, we invite you to discover the Mande Spa Outdoor collection.
Choosing Your Heat: Infrared Or Traditional Steam
This is where the magic begins. The very first—and most important—decision you'll make on your diy in home sauna journey is choosing its heart: the heat source. This choice will ripple through every other aspect of your build, from the construction details to the kind of wellness escape you create. Are you drawn to the deep, penetrating warmth of modern infrared, or the classic, steamy embrace of a traditional Finnish-style sauna?
Let's break down what makes each experience unique so you can build the sanctuary you’ve been dreaming of.

The Gentle Power of Infrared Heat
Think of infrared heat as a targeted warmth that works from the inside out. Instead of superheating the air in the room, infrared saunas use special emitters to send gentle wavelengths of light directly into your body. This raises your core temperature and produces a deep, cleansing sweat without the intense ambient heat of a traditional unit.
The experience is often described as a more tolerable, gentle heat, perfect for those who find high temperatures overwhelming. Temperatures typically hover between a comfortable 120°F and 150°F.
But the practical benefits are just as appealing for a DIY builder:
- Quick Heat-Up: An infrared sauna is ready to go in just 15-20 minutes. Perfect for a spontaneous session after a long day.
- Lower Energy Bills: By heating you directly, these units use significantly less electricity, making them a more budget-friendly option to run long-term.
- Targeted Relief: Many people, especially athletes or those with chronic pain, swear by infrared for soothing sore muscles and achy joints. The direct heat feels incredible.
The Timeless Ritual of Traditional Steam
When you picture a classic sauna, you're thinking of a traditional steam sauna. A powerful heater warms a pile of special rocks, bringing the room temperature up to a robust 160°F to 200°F. But the real magic happens when you ladle water over those hot stones.
This is the löyly—the Finnish word for the burst of soft, enveloping steam that transforms the dry heat into a humid wave of warmth. It’s a full-sensory experience that connects you to an ancient tradition of cleansing and renewal.
The classic sauna isn't just about heat; it's about the ritual. The sound of the water sizzling on the rocks, the billow of steam, and the intense yet refreshing humidity create an immersive environment that is both invigorating and deeply calming.
Choosing this path means you're building more than just a hot room; you're creating a space for a true ritual. The heat-up time is a bit longer, usually 30-45 minutes, but the reward is an authentic, powerful session that leaves you feeling completely refreshed.
If you're still weighing the options, our in-depth comparison of steam vs. infrared saunas is the perfect next read.
Infrared vs. Traditional Sauna A Head-to-Head Comparison for Your DIY Build
To really see how these two styles stack up for a home project, let's put them side-by-side. This table breaks down the key differences that will impact your build, your budget, and your daily wellness routine.
| Feature | Infrared Sauna (e.g., TheraSauna) | Traditional Steam Sauna |
|---|---|---|
| Heating Method | Infrared waves heat the body directly | Electric heater warms rocks to heat the air |
| Operating Temp | Lower: 120°F - 150°F | Higher: 160°F - 200°F |
| Heat-Up Time | Fast: 15-20 minutes | Slower: 30-45 minutes |
| Ambiance | Dry, gentle, radiant heat | Can be dry or humid with steam (löyly) |
| Energy Use | More energy-efficient | Higher energy consumption |
| Installation | Simpler; panels are easier to install | More complex; requires safety clearances & ventilation |
| Maintenance | Minimal; wipe down panels/surfaces | Regular cleaning of heater, rocks, and benches |
| Best For | Targeted pain relief, quick sessions, heat sensitivity | Authentic experience, social use, deep detoxification |
Ultimately, there's no wrong answer here. Your choice depends entirely on the experience you're chasing. Do you want a quick, therapeutic session to ease your muscles, or are you looking forward to a longer, meditative ritual steeped in tradition? Both paths lead to incredible wellness benefits.
The journey of creating a DIY in home sauna is profoundly rewarding, but for those who prefer to step directly into a perfectly crafted experience, MandeSpa offers a compelling alternative. Every MandeSpa sauna is a testament to quality, shipped from within the USA to ensure you receive a premium product, not a lower-quality import. If your goal is immediate relaxation and guaranteed performance, we encourage you to view the exquisite Vitality Sauna collection and find your effortless path to daily renewal.
Blueprint For Bliss: Planning Your Sauna Location And Layout
Before you even think about picking up a hammer or cutting your first piece of wood, your dream of a DIY in home sauna starts as a simple sketch on paper. Honestly, this is the most important part of the entire project. This is where you get real about turning that vision of a personal retreat into a workable plan that sidesteps those costly, soul-crushing mistakes later on.
Now's the time to ask the big questions. Where is this oasis going to live? Will it be tucked into a quiet corner of the basement? Maybe it's a stunning, spa-like extension of your master bathroom. Or you could go all out with a standalone cabin in the backyard. Each spot has its own vibe and, of course, its own set of practical challenges.
Finding The Perfect Spot
The right location is more than just an empty space—it has to work for you and the sauna. Think of it as finding a home that meets a few key requirements for safety, function, and pure enjoyment. Before you fall in love with a location, make sure it has the "three pillars" of solid sauna placement.
- A Solid Foundation: Your sauna needs to sit on a surface that is perfectly level, hard, and waterproof. Think concrete, tile, or even a high-quality luxury vinyl. Carpet is an absolute no-go; it's a guaranteed recipe for trapped moisture, mold, and mildew.
- Access to Power: Whether you land on an infrared or a traditional model, that heater is going to need its own dedicated electrical circuit. Planning your location close to your home's main electrical panel can make life a lot easier and keep electrician costs down.
- A Path for Ventilation: Good airflow is completely non-negotiable. It’s what keeps the air inside fresh and protects both your sauna and your home from moisture damage. You'll need an intake vent (usually near the heater) and an exhaust vent, so you have to figure out how you’ll route those in your chosen spot.
Jumping into a project like this puts you right at the heart of a massive movement in home wellness. It’s no surprise the global sauna market is on track to hit a staggering USD 1,438.3 billion by 2032. The biggest driver? Homeowners just like you, with residential demand making up a whopping 57-59% of the market as we all look for ways to prioritize our health.
Sizing Up Your Sanctuary
With a location locked in, it’s time to talk size and layout. Are you picturing a cozy, meditative pod just for you, or a more social space where you can unwind with family and friends?
- For the Solo Bather (think 4'x4'): A compact sauna is perfect for personal use and heats up quickly and efficiently.
- For Couples or Small Families (a 5'x7' is popular): This size easily allows for two-tiered benches, giving everyone the choice to sit higher for more intense heat or lower for a milder session.
- For Social Gatherings (something like an 8'x8'): A larger footprint can comfortably host a small group, turning your home into a true wellness destination.
The layout is just as crucial as the square footage. A classic, proven design is to place the heater near the door, with the benches arranged in an "L" shape or parallel to each other. This really maximizes the seating and makes the space feel open and inviting.
Here's a pro tip from years of experience: The upper bench is where you'll feel the most intense heat. Building a two-level design makes the sauna far more versatile and enjoyable for everyone, regardless of their heat preference.
Mapping Out The Technical Details
Now we get into the nitty-gritty. With your location and layout figured out, you need to map out the technical must-haves. Careful planning here will save you a world of frustration down the road. Before you finalize everything, it’s worth brushing up on the fundamentals of good spatial design. You can find some great expert tips for designing a room layout that can help you really nail the flow and feel of your sauna space.
Your technical checklist should have these items right at the top:
- Electrical Plan: This is not a DIY task unless you are an electrician. Bring in a licensed pro to figure out the power requirements for your heater. Most traditional sauna heaters need a dedicated 240V circuit, which is a critical safety measure.
- Ventilation Strategy: Pinpoint exactly where your vents will go. The intake should be low on the wall near the heater to draw in cool air, while the exhaust is typically placed higher up on the opposite wall to let warm, moist air escape.
- Framing and Insulation: Sketch out your framing. Standard 2x4 construction usually does the trick, but don't skimp on the insulation. You want that heat to stay in the sauna for maximum efficiency.
Looking for a little more inspiration on how to make your sauna a seamless part of your home? We’ve put together a guide full of beautiful home sauna room ideas.
While building your own sauna is an incredibly rewarding journey, we understand—it’s not for everyone. If you’re craving the deep, restorative benefits of a sauna without the sawdust and complexity of a full build, there’s an amazing alternative. We invite you to explore the Mande Spa Outdoor sauna collection. Every model is a masterpiece of engineering, shipped from right here in the USA, offering a direct path to effortless luxury and daily renewal.
Bringing Your Sauna To Life: A Practical Assembly Guide
You’ve got a solid plan. The vision is clear. Now comes the moment every builder lives for—turning that blueprint into a reality. This is where your dream of a DIY in home sauna starts to take shape, board by board. Forget a rigid checklist; think of this as a journey, a series of milestones that brings your personal sanctuary to life.
It all begins with the skeleton: the framing. This is the backbone of your sauna, defining the space and supporting everything to come. Using standard 2x4 lumber, you’ll build the walls and ceiling frame just like you planned. Take your time here. Precision is your best friend—making sure your walls are perfectly plumb and square now will save you a world of frustration down the road.
The Foundation of Performance: Insulation and Vapor Barrier
With the frame standing proud, it’s time to focus on the things you’ll never see but will feel every single time you use your sauna. High-quality insulation isn't just a suggestion; it's essential. This is the secret sauce for a sauna that heats up quickly, holds its temperature steady, and keeps your energy bills from skyrocketing.
The mission is to fill every single cavity in your walls and ceiling with insulation rated for high heat, like mineral wool or fiberglass batts. This creates a powerful thermal envelope that traps that glorious heat right where you want it.
Next up is the vapor barrier, and I can't stress this enough: this is one of the most critical steps for protecting your home. Saunas generate a lot of moisture. Without a bulletproof barrier, that steam can creep into your wall cavities, creating a nightmare of mold, mildew, and even structural damage. You'll want to use a foil-backed vapor barrier, meticulously taping every seam with high-temperature foil tape to create a completely sealed, impermeable shield.
Think of the vapor barrier as your sauna's raincoat. It ensures all that wonderful steam stays inside the sauna where it can be managed by your ventilation, safeguarding the integrity of your home's structure for years to come.
This flowchart breaks down the three pillars of planning before you ever cut a single board.
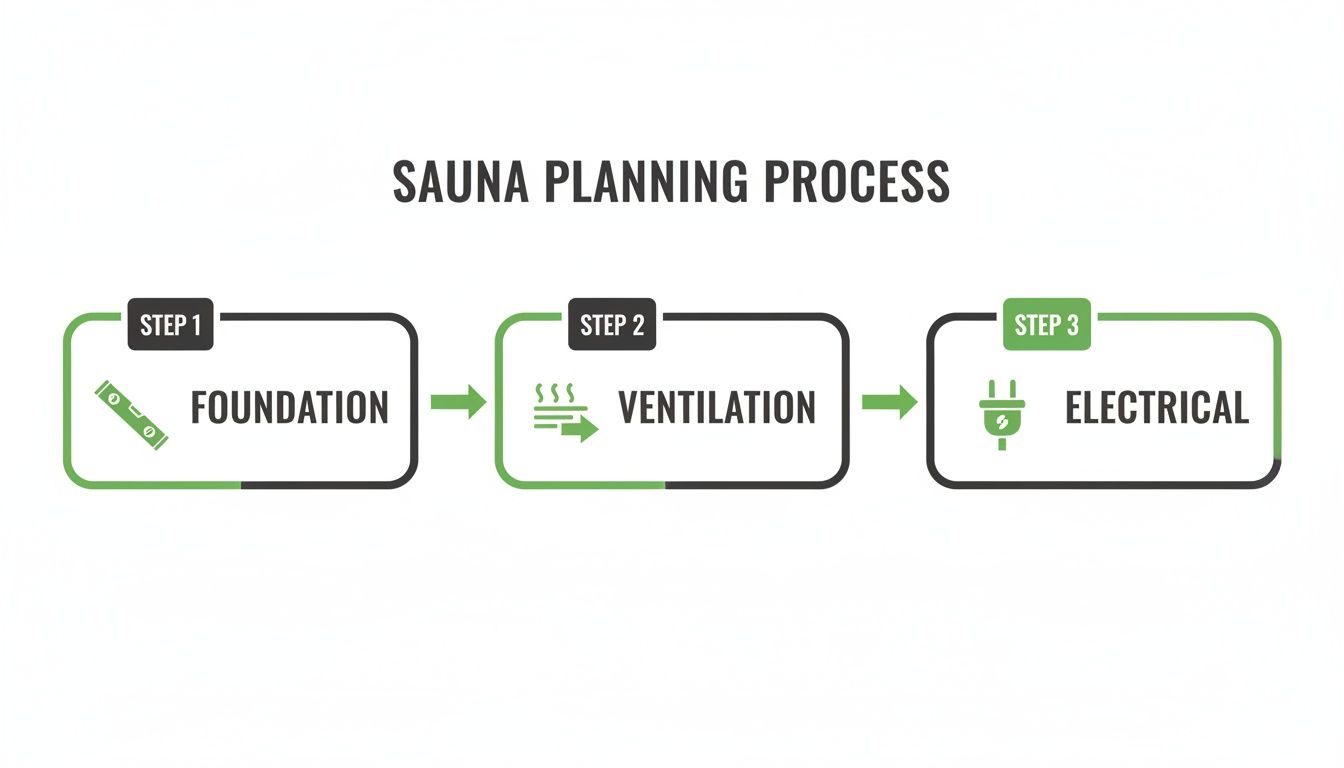
As you can see, a level foundation, smart ventilation, and safe electrical work are the bedrock of any successful sauna build.
Wiring and Cladding: The Heart and Soul
Now for the elements that truly bring your sauna to life—the power and the personality. Running the electrical wiring is a job for the pros. Period. While you can map out exactly where your heater, lights, and controls will be, the actual hands-on wiring should be done by a licensed electrician. They’ll ensure you have a dedicated circuit, proper grounding, and that everything is up to code. This is non-negotiable for safety and peace of mind.
Once the wiring is roughed in, the real fun begins: cladding the interior. This is the magical part where your framed box transforms into a stunning, aromatic retreat.
- Aspen: A brilliant hypoallergenic choice. It has a clean, bright look and won't release any aromatic oils.
- Cedar: The classic. It’s famous for its durability, rich color, and that unmistakable, soul-soothing aroma.
- Pine: A great budget-friendly and authentic option, but be prepared for it to release a bit of resin, especially when it's new.
Starting from the floor and working your way up, you’ll fit the tongue-and-groove boards together snugly. The craftsmanship here is what makes the space feel special. Of course, building a sauna involves some serious woodworking skill. For anyone looking for professional insight, understanding the process of finding the best carpentry in Singapore can offer some valuable perspective.
Benches, Heater, and Final Assembly
With the walls and ceiling glowing with fresh wood, your sauna is almost complete. The focus now shifts inside. Building strong, comfortable benches is an art form. You'll typically frame them with 2x4s and top them with smooth-sanded 1x4 or 2x2 boards, leaving small gaps for air and water to move freely.
Next, you'll install the heart of the sauna: the heater. Whether it's a traditional rock heater or a modern infrared unit, follow the manufacturer’s installation guide to the letter. Pay close attention to the required safety clearances from walls and benches to eliminate any fire risk.
The final construction step is hanging the door. For safety, a sauna door must always open outwards. A tempered glass door is a popular choice, as it helps the space feel more open and less confined. A good, tight fit is key to keeping the heat in. With the door hung, the heavy lifting is officially done! For more ways to keep costs down, check out our guide on https://vitalitysaunastore.com/blogs/news/how-to-build-a-sauna-cheap for extra tips.
Adding The Final Touches For Lasting Enjoyment
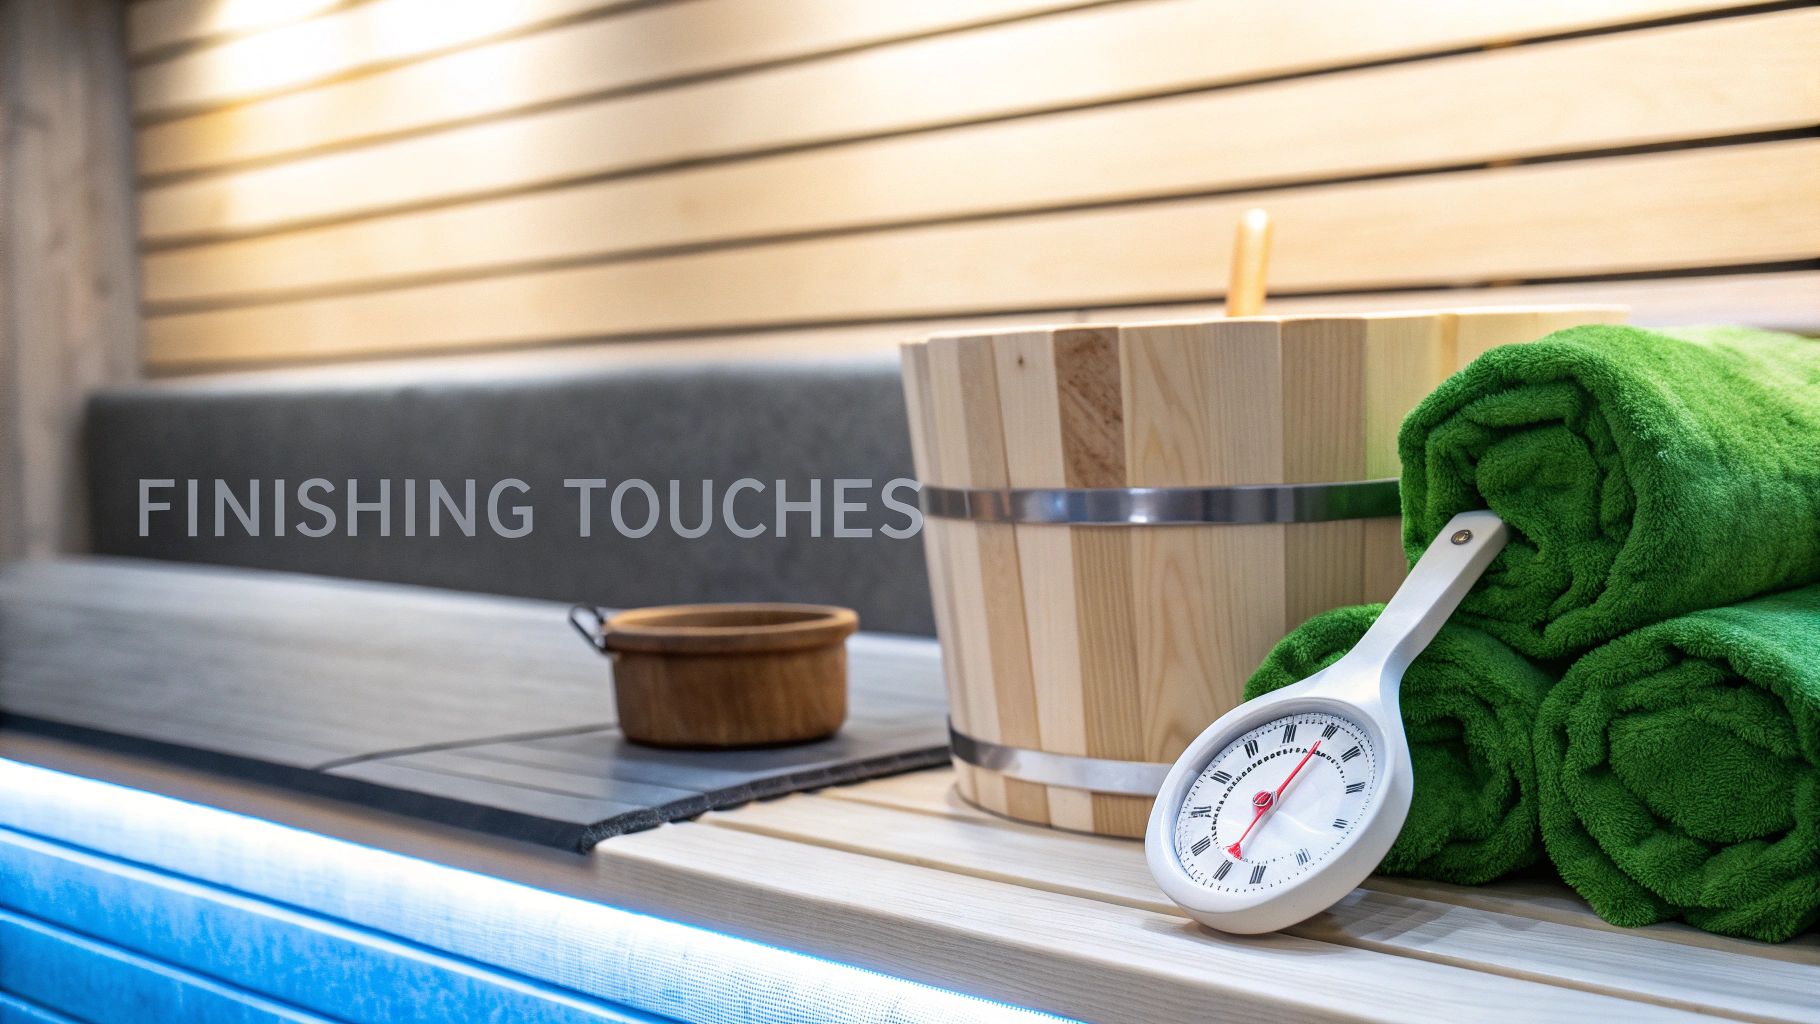
The last board is in place. You’ve officially built a sauna. But the real magic happens now, transforming that beautiful wooden box into your personal sanctuary. This is where you get to infuse your DIY in home sauna with the comfort, safety, and personal flair that make it truly yours.
These aren't just cosmetic afterthoughts; these finishing elements are what elevate the entire experience, ensuring every session is as deeply restorative as you imagined.
Elevating The Experience With Essential Accessories
The right accessories are what turn a functional heat room into a luxurious retreat. Think of them as small investments that pay off massively in comfort and enjoyment, completing the sensory journey you set out to create.
Here are a few things I'd never build a sauna without:
- A Reliable Thermometer and Hygrometer: These are non-negotiable. The thermometer is your guide to a safe and consistent session, while the hygrometer lets you dial in the humidity—absolutely crucial for that perfect steam in a traditional sauna.
- Ergonomic Backrests: It’s a game-changer. A simple curved backrest lets you lean back and fully melt into the heat, a world of difference from pressing against a flat, hot wall.
- Ambient Lighting: Harsh, bright lights kill the vibe. You want a soft, gentle glow. Look for low-voltage, vapor-proof fixtures designed for saunas; they create a tranquil atmosphere that invites total relaxation.
- A Classic Bucket and Ladle: If you have a traditional sauna, these are the heart of the löyly ritual. A beautiful wooden set just feels right and completes the authentic experience.
For more ideas on outfitting your new space, check out our guide to the best accessories for your sauna.
Initial Safety Checks and The First Heat Cycle
Before you even think about jumping in, it's time for a "test flight." A few simple safety checks will give you complete peace of mind.
First, run the heater through a full cycle with no one inside. This initial "burn-off" is important—it cures the heating elements and clears out any residual oils from the manufacturing process. While it's running, keep a close eye on your thermometer to ensure it's registering the temperature accurately. Most importantly, verify that the high-limit safety sensor works, automatically shutting the heater off if it gets too hot.
Your very first sauna session is a milestone you've worked hard for. But safety is the foundation of relaxation. Taking a moment to double-check every safety feature ensures your sanctuary is not just a place of peace, but also a place of total security.
A Simple Plan For Long-Term Care
You've just made a significant investment in your well-being, and a little bit of care will keep it paying dividends for years. The goal is simple: keep the wood clean, the air fresh, and the heater working perfectly.
After each session, just prop the duckboards off the floor (if you have them) and leave the door open. This allows everything to air out and dry completely. A quick wipe-down of the benches with a damp cloth is usually all they need. For a deeper clean now and then, a mild solution of warm water and a splash of white vinegar is perfect.
Whatever you do, stay away from harsh chemical cleaners. The wood can absorb them and release unpleasant fumes when heated. By treating your sauna with a little respect, you’re protecting your investment and ensuring this wonderful space remains a source of renewal for a lifetime.
When DIY Isn't the Right Fit: The Mande Spa Advantage
Building your own sauna is an incredible journey, and there’s a real sense of pride that comes from creating a wellness space with your own two hands. It's a deeply personal and rewarding project. But let's be honest—it’s also a serious commitment. It demands time, a specific set of skills, and a good deal of patience for the inevitable construction hiccups.
For some of us, the real goal isn't the building process itself, but the immediate peace and relaxation a sauna brings. If that sounds like you, there’s a different path to consider—one that leads directly to effortless luxury, not a construction site.
Guaranteed Excellence, No Assembly Required
Choosing a pre-built Mande Spa outdoor sauna is about making a conscious choice for your well-being and your time. These aren't just kits in a box; they are meticulously engineered wellness retreats, designed for people who'd rather spend their evenings unwinding inside a sauna than building one.
Every Mande Spa sauna ships from within the USA, which is a huge mark of quality compared to many lower-grade imports you'll find online. When you invest in a Mande Spa, you're getting:
- Premium Materials: Hand-selected woods and components built for beauty and longevity.
- Engineering Excellence: Thoughtfully designed for peak heat efficiency, performance, and safety.
- Timeless Design: These are elegant structures that enhance your home and landscape, not just functional boxes.
Let’s put it this way: buying a pre-built sanctuary means you get to skip the entire learning curve. You avoid the guesswork, the risk of expensive mistakes, and the countless hours of labor, fast-forwarding straight to guaranteed quality and total peace of mind.
This desire for a reliable, high-end wellness solution is a powerful driver in the market. While DIY is a fantastic option, the demand for premium, pre-built saunas is booming. In fact, residential setups are projected to make up 57.3% of the market in 2025. It turns out a lot of homeowners prefer the certainty that comes with professional craftsmanship. You can dive deeper into this trend and the growth of the home sauna market.
An Invitation to Your Personal Retreat
Ultimately, choosing Mande Spa is an investment in your most valuable asset: your time. It’s for the person who wants to cap off a long day with the soothing embrace of steam, not a construction checklist. It's about immediately creating that personal haven for daily renewal, a space for intentional well-being.
If quality is non-negotiable and you want to start soaking up the benefits of a sauna without the hassle of a major project, I’d encourage you to explore the Mande Spa Outdoor collection. Just imagine how a beautifully crafted sauna could elevate your home, your health, and your everyday life.
Common Questions About Building a Home Sauna
Taking on a DIY in home sauna project is an incredible journey. But as you get your hands dirty, you're bound to have some questions pop up. That's completely normal. Getting those questions answered is the key to building a safe, beautiful retreat you'll love for years.
Let's dive into some of the most common things people ask when they're in your shoes.
What’s the Real-World Cost for a DIY Sauna?
This is the big one, and the honest answer is: it depends entirely on your vision. For a simple, cozy sauna tucked into a corner, you could realistically get it done for $3,000 to $5,000. If you're dreaming bigger—think premium cedar, a top-of-the-line heater, and more space to stretch out—your budget might climb to $10,000 or more.
What really moves the needle on cost?
- Size: A larger footprint simply requires more lumber, insulation, and materials.
- Wood: Cedar is the gold standard for a reason, but it comes at a premium. Woods like Pine can be a great way to keep costs in check.
- Heater: The heart of your sauna! Infrared panels and traditional Finnish-style electric heaters come in at different price points.
- Labor: This is the one place not to skimp. Always budget for a licensed electrician to handle the wiring. It’s a non-negotiable safety investment.
Do I Really Need a Permit to Build My Sauna?
This is a fantastic question, and the answer almost always comes down to where you live. While a small, self-contained sauna inside your home might fly under the radar, any project that involves running a new electrical circuit—which most saunas do—will almost certainly require a permit.
My best advice? Call your local building department before you even buy the first 2x4. It’s a simple step that ensures your project is safe, compliant, and won't cause headaches down the road. Peace of mind is priceless.
What's the Best Flooring to Put Under a Sauna?
Your sauna needs to sit on a solid, waterproof base. You're looking for a hard surface that won’t absorb moisture or become a breeding ground for mildew.
The best choices are almost always:
- Concrete
- Tile
- Luxury Vinyl Plank (LVP)
Whatever you do, never install a sauna directly on carpet. It’s a recipe for moisture problems. Just as important is making sure the surface is perfectly level—this is crucial for the structural integrity of your build and for getting the door to hang and seal just right.
Building your own sauna is an immensely rewarding experience, but it’s not the right path for everyone. If you're looking for guaranteed quality, expert craftsmanship, and a stunning design without the guesswork, Mande Spa Outdoor is a fantastic alternative. Shipped from right here in the USA, their saunas are a world apart from lower-quality imports. Take a look at the Mande Spa Outdoor collection and see how a premium, pre-built sauna could elevate your home and well-being.
